A rolling test stand is a really nice tool to have. I have had one made by KFC-Zeller in Germany for years but I was not using mine because it was not installed permanently.
I modified it to permanently install it on my workbench ready to use
The STL files for the blocks are available on my GitHub if you want to make one for yourself. All that you need is some 3mm and 6mm linear rods. The trolleys can be found on AliExpress. (search for: Track Roller Test Stand)
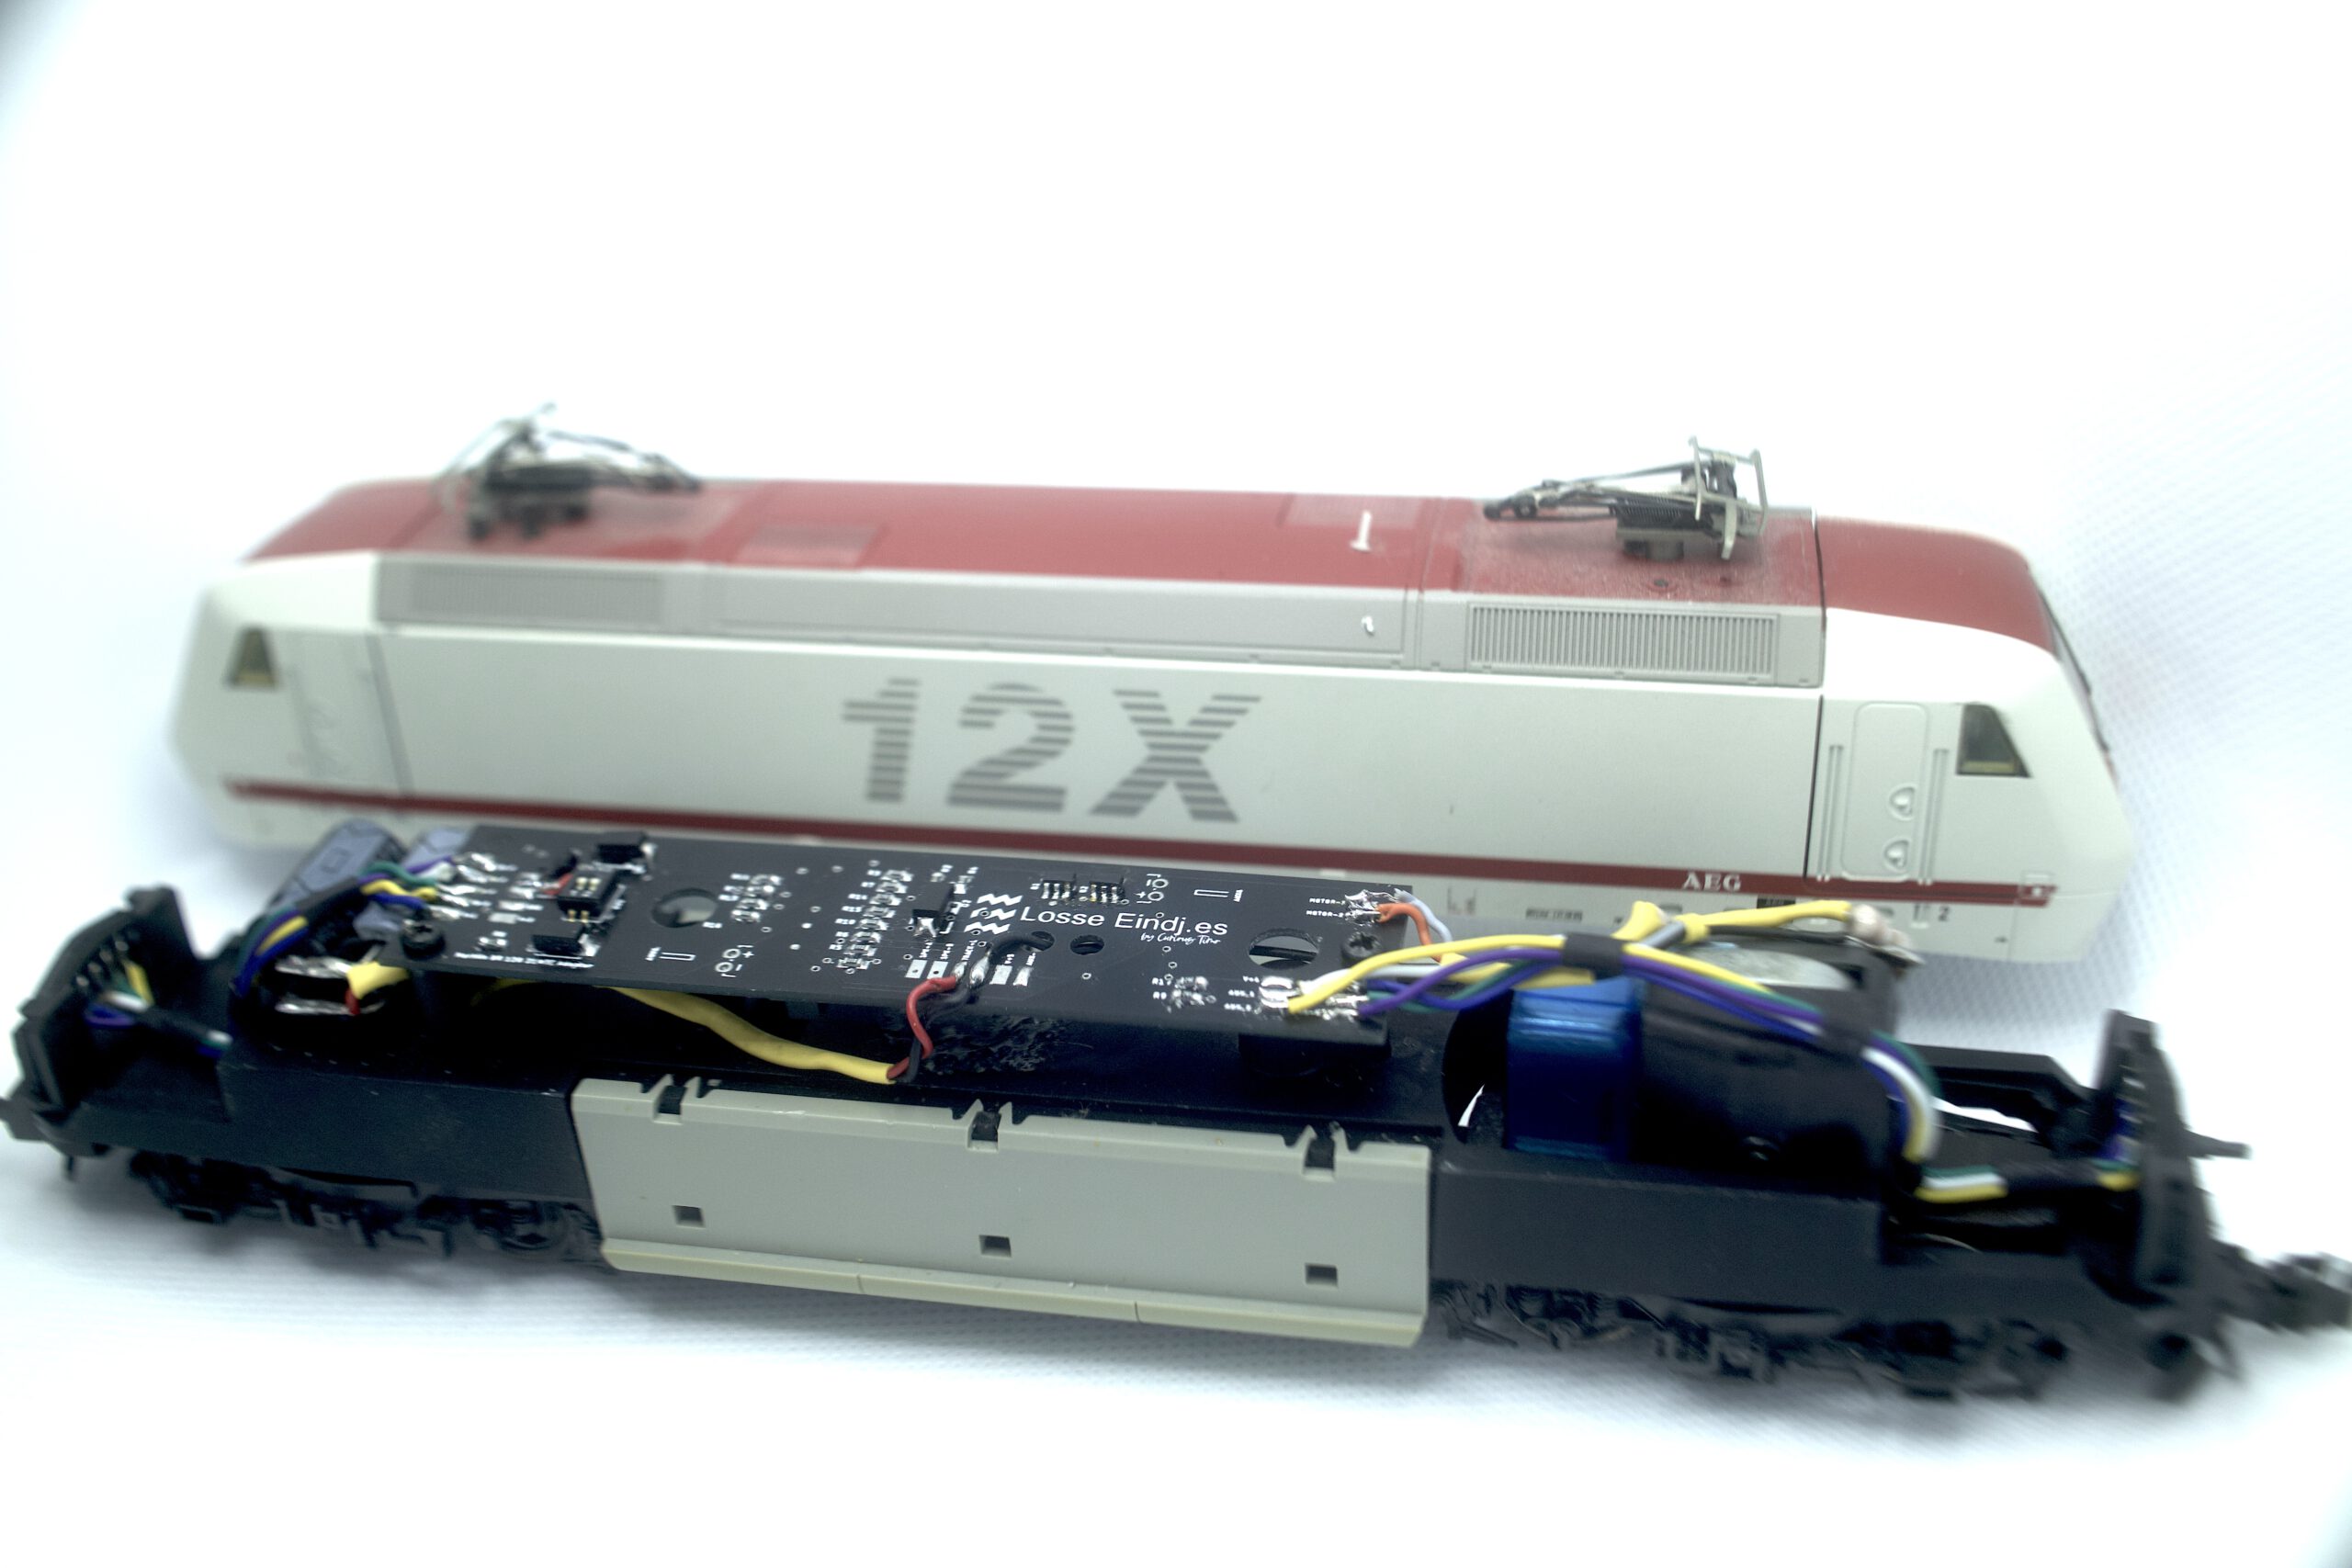
During winter time I like to fool around with model trains. Because of the Covid-19 evening curfew, the winter season is extended and I took the time at home to really get into converting some of my locomotives to LED lights and ESU Lokpilot decoders.
The Märklin BR 128 was the first patient and received a new 21MTC adapter PCB. Stock from Märklin it already has LED lights but I wanted to add High Beam and Shunting lights so it also received new LED PCBs.
The PCBs were designed in Eagle CAD and made by JLCPCB in China. They use all SMD components so I opted for using solder paste and a hot air solder station to do the soldering. The design also incorporates two parallel capacitors that function as a power buffer. They can be switched on or off using an SMD switch on the adapter PCB.
To prevent light scatter I used Fusion 360 and my Prusa MK3s to make a plastic spacer that goes in front of the LED PCBs.
I’m very happy with the end result and clean install. The design files are available on my GitHub.
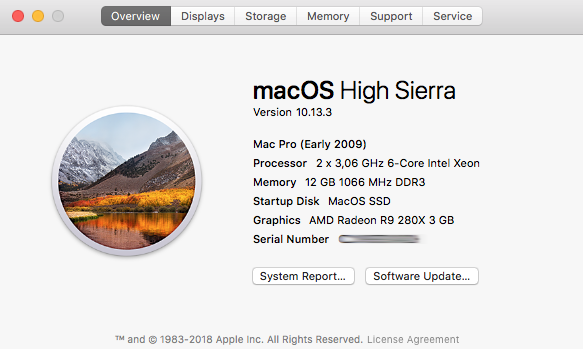
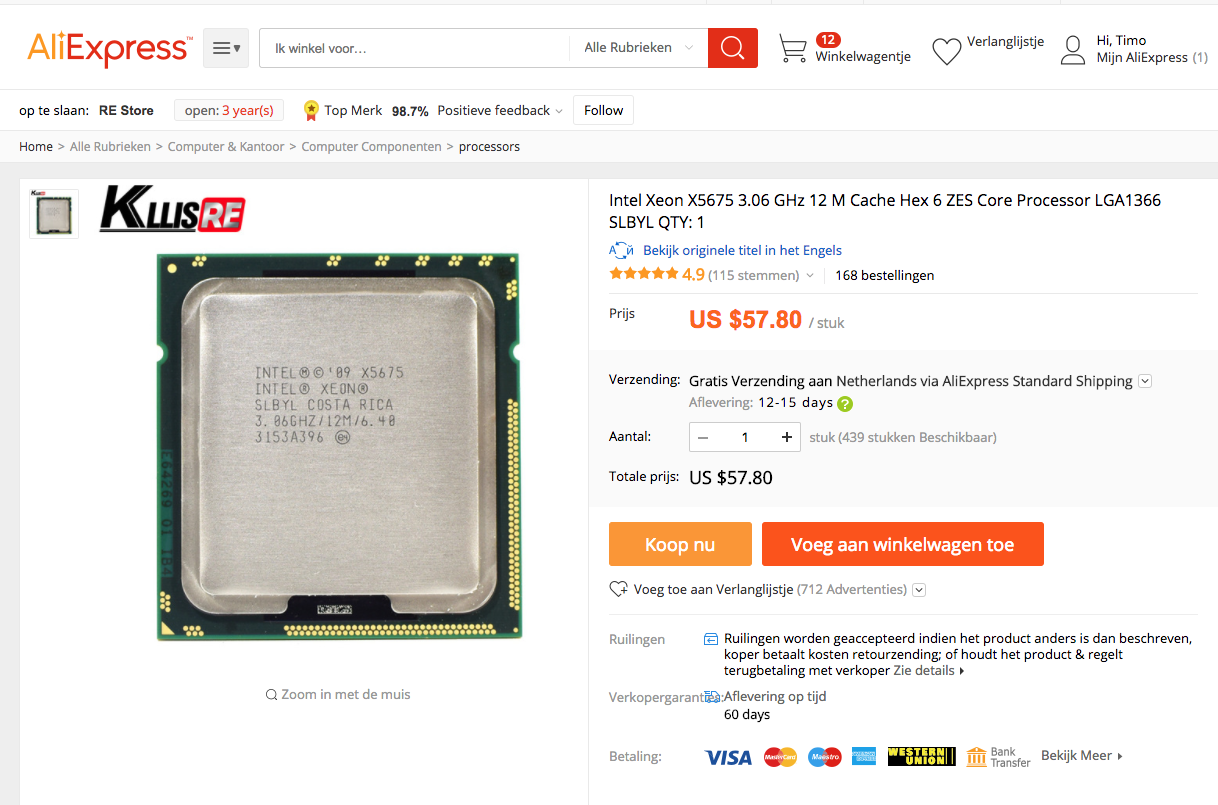
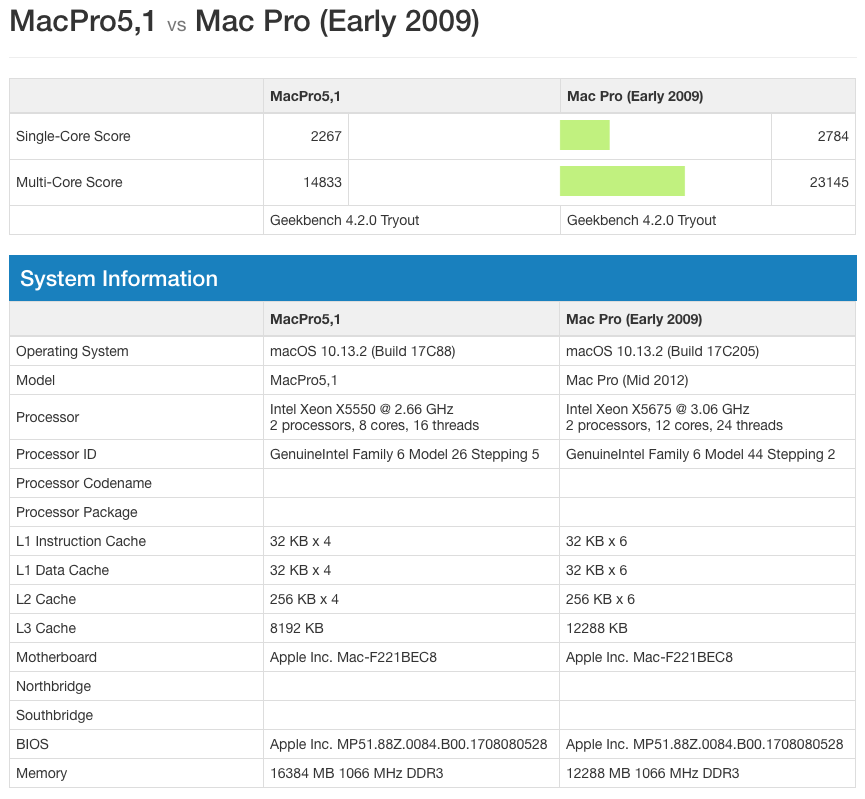
Back in 2009 when Apple released the 4.1 Mac Pro they used CPUs without an Integrated Heat Spreader on the Dual CPU system. The Single CPU and later 5.1 systems don’t use these. They use the standard CPU with IHS. When upgrading my 4.1 Mac Pro to 2×6 core X5675 CPUs I had to make a decision. Modify the Mac Pro or delid the X5675 CPUs. Since the Mac Pro CPU tray is worth a multiple of the new CPUs I decided to use an electric heat gun to modify the CPUs.
The word „lid“ refers to the IHS on a CPU and therefore, in simple terms, delidding means removing the lid. Delidding got really popular in late 2011 with the launch of the Ivy Bridge microarchitecture which was the third generation of processors based on the 22nm manufacturing process developed by Intel®. The new CPU was the upgrade of the Sandy Bridge architecture and should have brought better power efficiency, lower TDP, and lower temperatures. However, users noticed that their Ivy Bridge processors spiked higher temperatures than the old Sandy Bridge CPUs. This made overclocking a bit of an issue, and overclocked processors were hitting 100°C very easily.
Because of this overclockers found ways to remove the IHS from the CPU and upgrade the cooling solutions on these CPUs.
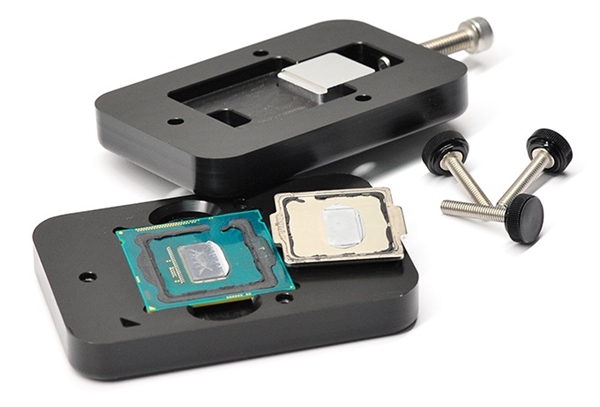
So how is delidding actually done? The very first deliddings were done with a razor blade or any other very sharp tool. And as we said, the IHS is glued to the PCB, and you can work your way around the CPU die, cut the glue, and thus release the IHS. This is a tricky task because the blade can scratch the PCB and that can ruin your CPU. You also need to make sure that you don’t push the blade in too deep – some processors have various SMD components (resistors, capacitors, diodes etc.) under the IHS.
There are various delidding methods know. Some use a hammer and a vice and the safer ones use special developed delidding tools.
The problem with the x5675 Westmere Xeon CPU is that the IHS is soldered to the CPU and there are no knows delidding tools available for these CPUs. It is just not a very common CPU to delid I guess. Since it’s only real delidded use is in a 2009 Dual CPU Mac Pro 4.1.
Still wanting to upgrade my Mac Pro to 12 core Westmere Xeon goodness I got the electronic heat gun from the shed and did the delid myself.
You can follow my delidding adventure on my YouTube Channel.
At first, I had a hard time finding the single edge blades. This is because I was looking for shaving blades. Turns out that these blades are not used for shaving but for cleaning windows. You can find them on Amazon
The Geekbench 4 benchmark improved nicely to just over 23k
And my BruceX went from 38s to 30s. The system now also support faster PC3-10600 DDR3-1333MHz
Not a bad upgrade in my opinion.
We use cookies to ensure that we give you the best experience on our website. If you continue to use this site we will assume that you are happy with it.